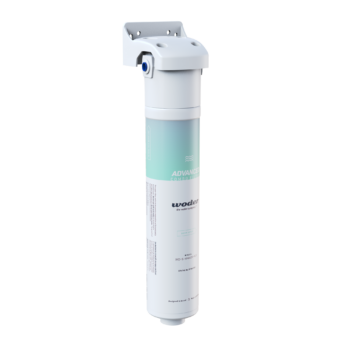
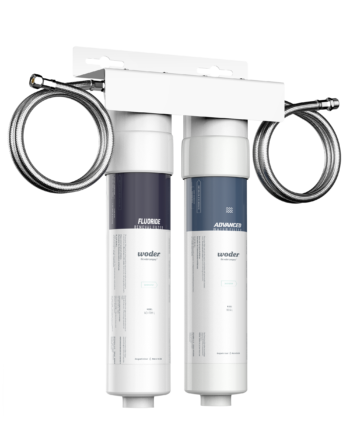
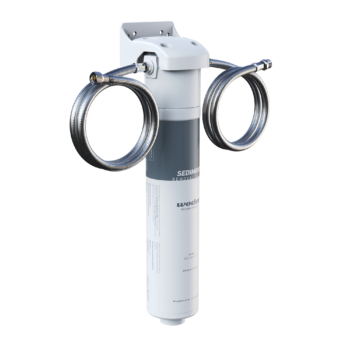
Shut off the cold valve, unscrew the faucet hose from it, attach the Woder inlet and outlet hoses, mount the housing, then check for drips and run the faucet for a few minutes. Plan on 30 to 45 minutes and one wrench. No drilling. Shop our under-sink water filter systems if you haven’t picked one yet.
Which connection do you have? Woder systems use one of three. If the box says DC, you’re in the right place. If you see push-in John Guest fittings, our JG Quick-Connect guide is the one you want. Splicing into a fridge, ice maker or RV line is covered in our Inline Connection guide.
Never worked under the kitchen sink before? That’s fine. Our Direct Connect (DC) systems go between the shutoff valve and the faucet hose you already have. You won’t drill the counter, add a second faucet, or cut a single pipe.
Below you’ll find the tools, each step, rough plumber pricing, and the small hiccups people sometimes hit on day one.
Before You Start
Before you install a water filter under a sink, empty the cabinet. Seriously, all of it. You’ll want room to lie on your back and see the valves.
Then grab a few things: an adjustable wrench (two if the nuts are tight), a towel, a small bowl for drips, a flashlight, and a marker for the install date. A roll of Teflon tape helps if the valve threads look worn.
Open the Woder box and lay out the housing, cartridge, hoses and mounting hardware. Check them against the parts list. If you haven’t settled on a model, our Gen4 Advanced under-sink filters are where most people start.
Check Your Setup First
Take a good look under there. Most US kitchens built in the last few decades have a 3/8-inch compression outlet on the shutoff valve. Compare that with the connection size on your product page. If yours looks different, snap a photo and send it to our support team before you begin.
Test the valve, too. Turn it off and open the faucet. If the flow stops, great. If it keeps trickling, the valve is worn, which happens a lot in older homes. In that case, shut off the main to the house while you work, and think about replacing that old valve. It’s a cheap part.
Got a pull-down faucet with a hanging weight? Note where the weight sits on the hose so the housing doesn’t block it.
The Install, Step by Step
Follow this order to install under sink water filter system parts. Take your time on the first connection. The rest goes quickly.
Step 1: Shut Off the Cold Side
Find the angle stop valve for the cold side. It’s usually on the right. Turn it clockwise until it stops, then open the kitchen faucet to bleed off pressure. A small dribble is normal.
Step 2: Take the Faucet Hose Off
Put the towel under the valve. Loosen the nut that holds the faucet hose with your wrench, then spin it off by hand. Expect a little splash.
Step 3: Connect the Woder Hoses
Thread the Woder inlet hose onto the valve and snug it with the wrench. A quarter turn past hand-tight is plenty. Then connect the outlet hose from the filter to the faucet hose you just removed. Now your cold water supply line runs through the filter before it reaches the faucet. Check the flow arrow on the housing.
Step 4: Mount the Housing
Optional, but we recommend it. Screw the bracket to the side or back wall of the cabinet, about 2 to 3 inches off the floor, so you can twist the cartridge off later. Renting and don’t want holes? Let the housing stand on the cabinet floor.
Step 5: Turn It Back On
Open the valve slowly. Give the system a minute to fill. Then do a proper leak check: run a dry paper towel around every connection. Dry towel, you’re good. One drop, tighten that nut a hair.
Step 6: Flush Before Drinking
Run the faucet for about 5 minutes to flush the new cartridge. That clears fine carbon dust and trapped air. If the first glass looks cloudy, wait 30 seconds. It’s air, and it clears from the bottom up.
A typical under-sink water filter install doesn’t get more complicated than this. Write the date on the housing so you know when the next swap is due.
Mistakes We See From First-Timers
Most install problems come from the same handful of slips, and all of them are easy to avoid.
Overtightening is number one. People crank the nut as hard as they can, which can crack the fitting or squash the washer inside. Snug plus a quarter turn is enough.
Next is skipping the pressure release. If you don’t open the tap after closing the valve, the line stays pressurized and you get a surprise spray when the hose comes off.
Some folks also forget the flow arrow and connect the hoses backward. Flow drops and the cartridge can’t do its job. Flip them around and you’re fine.
The last one is mounting the housing too low. If there’s no room underneath, you’ll be fighting it at every cartridge change. Leave a couple of inches.
What a Plumber Would Charge
Doing it yourself costs nothing beyond the system. Woder DC units come with the connection hoses, so a standard kitchen faucet usually needs no extra parts.
If you’d rather hire someone, the cost to install under sink water filter systems varies by area and job. Common home service estimates put a simple under-sink install somewhere around $100 to $300 for a plumber, more if they need to drill the counter or add a faucet. A handyman usually charges less.
People also ask how much to install a water filter under the sink when the system needs its own faucet, which is common with reverse osmosis. Those jobs take longer and cost more. Woder DC systems use your existing faucet, so you skip that work entirely. Still comparing? Our buyer’s guide to choosing a water filter walks through the options.
Troubleshooting
A drip at a connection usually means the nut needs a touch more. Shut off the water, tighten slightly, and test again. If the threads look worn, wrap them with tape.
Low flow? Make sure the shutoff valve is fully open. A new cartridge sometimes needs a longer flush, too. A sputtering faucet is just trapped air, so run it for a minute or two.
Swapping the Cartridge Later
Most Woder cartridges last six to twelve months. When it’s time, close the valve, open the faucet to release pressure, twist the old cartridge off and the new one on. Flush for a few minutes and you’re set. New cartridges are on our replacement page.
Frequently Asked Questions
How long does it take to install an under-sink filter?
Most people finish a Woder Direct Connect install in 30 to 45 minutes. If it’s your first time working under a sink, give yourself an hour. Clearing out the cabinet and hunting down the right wrench usually take longer than the install itself.
Do I need to drill a hole in my sink or countertop?
No. Woder DC systems connect between your existing shutoff valve and faucet hose, so the filtered flow comes out of the faucet you already have. There’s no second faucet, no drilled countertop, and no cut pipes involved.
How much does it cost to have a plumber install an under-sink filter?
It varies by location, but simple jobs often land around $100 to $300 in labor. Installs that need a dedicated faucet or a drilled countertop cost more. Since Woder systems use your existing faucet, most people skip the plumber entirely.
Will an under-sink filter reduce my pressure?
You may notice a slight drop in flow, which is normal for any filter at the faucet. A sharp drop usually means the valve isn’t fully open or the cartridge needs a longer flush. An old, clogged cartridge also slows flow, which tells you it’s time for a swap.


