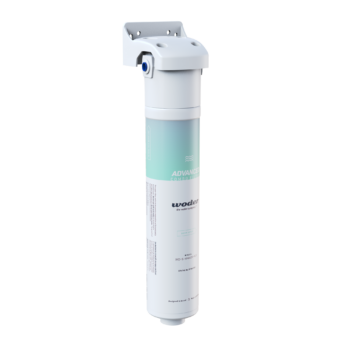
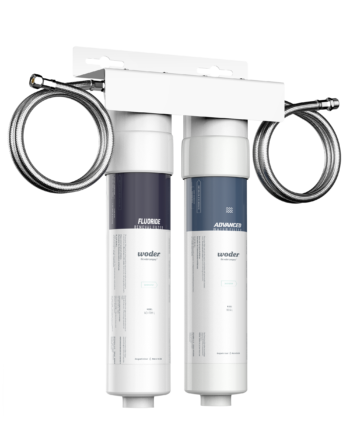
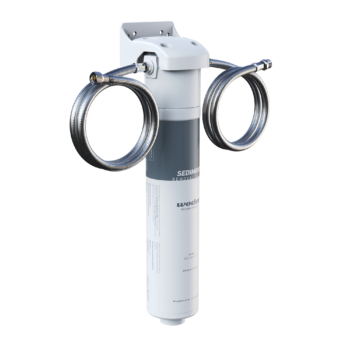
Shut off the line, trim the tubing straight, push it into each fitting until it bottoms out, snap on the clips, then open the supply and run the tap for a few minutes. You won’t need a wrench for the fittings, and most people finish in 15 to 20 minutes. Browse our inline quick-connect filters.
Not sure which guide you need? Look at the ends of your Woder system. Push-in fittings with a colored ring mean JG, so stay here. Threaded hoses that screw onto the shutoff valve mean Direct Connect, and our Direct Connect (DC) guide covers those. Splicing into a fridge or RV line has its own Inline Connection guide.
A lot of people put off filtering their tap because they picture wrenches, puddles and a plumber’s invoice. Quick-connect fittings take most of that away. If you’ve been hunting for an easy install under-sink water filter, a JG system is about as simple as it gets. Push the tubing in and it locks. Press the ring and it lets go.
This guide covers how the fittings work, what to have on hand, and the install itself.
What’s Inside a JG Fitting
Woder uses John Guest push-to-connect fittings, a design the drinking-supply industry has trusted for decades. You’ll find the same style on fridge lines and commercial ice machines.
Each fitting has three parts inside. An O-ring seals around the tube. Stainless steel teeth grip it once it’s pushed in. And the collet, that colored ring on the outside, releases the teeth when you press it.
Many fittings add a small clip as well. Together, the collet and lock clip stop the line from popping out by accident. That’s why water filter quick connect fittings hold tight under normal household pressure, yet come apart in seconds when you swap a cartridge.
Most Woder JG systems run on 1/4-inch tubing, the usual size for drinking lines, fridges and ice makers. Your product page lists the size for your model.
What to Have Ready
The list is short. A tubing cutter or a sharp utility knife, a towel, a small bowl for drips, a marker, and your Woder system. With push-in fittings there are no tools required for the connections themselves. The cutter is only for trimming.
Pick the Spot Before You Cut
Spend two minutes on placement. It saves you from redoing the job.
Leave at least 2 to 3 inches of clear space below or beside the housing so the cartridge can come off later. Plan gentle curves for each line, because a tight kink slows flow and stresses the fitting. Keep the unit near the cabinet door, not tucked behind the disposal. And keep it away from a dishwasher vent or a hot pipe.
Renting? Skip the screws and let the housing stand on the cabinet floor. Take a quick photo of your layout when you’re done. It makes the next swap faster.
One more planning tip. Measure twice before you cut, and leave a little slack in each run. A line that’s pulled tight looks neat on day one, but it tugs on the connection every time someone shoves a trash bag or cleaning bottles into the cabinet. An extra inch or two of tube costs nothing and saves you a slow drip six months from now.
The Steps
These steps show how to install under sink water filter system parts with JG fittings, whether the filter feeds a drinking line or a dedicated faucet.
Step 1: Shut Off and Release Pressure
Turn the valve that feeds the line clockwise until it stops. Open the faucet, or press the fridge dispenser, to let the pressure out. Put the towel down.
Step 2: Trim the Tubing
Measure what you need and cut. Make sure you cut tubing square, straight across instead of at an angle. An angled cut is the number one reason push-in fittings leak. Wipe the end and check that it’s round, not squashed.
Step 3: Push It In
Mark the tube about 5/8 of an inch from the end. Push it firmly into the fitting. You’ll feel it slide past the O-ring and hit the tube stop. The mark should sit right at the edge of the collet. If it doesn’t, push harder.
4: Clip It
Snap the clip between the collet and the fitting body so nobody presses the collet by accident. Give the line a gentle tug to make sure it’s locked.
Step 5: Turn On, Check, Flush
Open the valve slowly and wait a minute while the housing fills. Do a quick leak check with a dry paper towel around every fitting. All dry? Run the faucet for about 5 minutes to clear air and fine carbon dust.
And that’s how to install a water filter under a sink with quick-connect parts. No threads, no tape, no wrench on the fittings.
Taking a Fitting Apart
You’ll do this at cartridge time. Turn off the supply and release pressure, pull the clip, press the collet evenly toward the fitting body and hold it, then pull the line out. If it won’t budge, push it in a little first, then press and pull again. Fresh cartridges are on our replacement cartridges page.
When Something Drips
A drip at a fitting nearly always means the tube isn’t fully seated or the cut was angled. Shut off the water, release the line, trim a fresh square end, and push it back in to the mark.
If the line pops out, check that the clip is on and the tube reached the stop. Scratches near the end can also break the O-ring seal, so trim past any damaged spot.
Still deciding which system to buy? Our guide to the types of water filters lays out the options.
Frequently Asked Questions
What size tubing do JG quick-connect fittings use?
Most Woder JG systems use 1/4-inch outside diameter tubing, the standard size for drinking lines, fridge lines and ice makers. Check your product page before buying extra, since John Guest also makes fittings for 3/8-inch and other sizes.
How do I remove tubing from a quick-connect fitting?
Turn off the water and release the pressure first. Remove the lock clip, press the colored collet evenly toward the fitting, and pull the line out while you hold the collet down. If it sticks, push the line in slightly, then try again.
Why is my quick-connect fitting leaking?
The usual causes are an angled cut, a tube that isn’t pushed all the way in, or scratches near the end. Shut off the water, release the line, trim a clean square end, and push it in until it hits the tube stop. That fixes almost every case.
H3: Do I need tools to install a JG quick-connect filter?
Not for the fittings. You’ll only need a tubing cutter or a sharp utility knife to trim the line to length. A towel and a small bowl come in handy for the few drips that come out when you open the line, but that’s about it.


