- Why the No-Extra-Faucet Setup Works So Well
- What You Need Before You Start
- Step-by-Step: Installing Your Woder Inline Filter
- Common Installation Questions
- What the Filter Is Actually Doing
- Maintenance After Installation
- FAQs
Installing an inline water filter is one of the most practical upgrades you can make to your home's water quality—and with a Woder, you don't need a dedicated faucet, a storage tank, or a plumber to do it. You connect the filter directly into your existing cold water supply line, and that's essentially the whole job. This guide walks you through every step, from picking the right spot to flushing the media before first use, so you end up with clean, mineral-rich water without unnecessary complexity.
Why the No-Extra-Faucet Setup Works So Well
Most under-sink filtration systems route filtered water through a separate faucet that requires drilling a new hole in the countertop or sink deck. That means extra fixtures, extra lines, and extra work. The inline approach skips all of it.
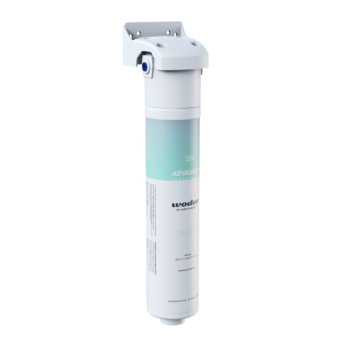
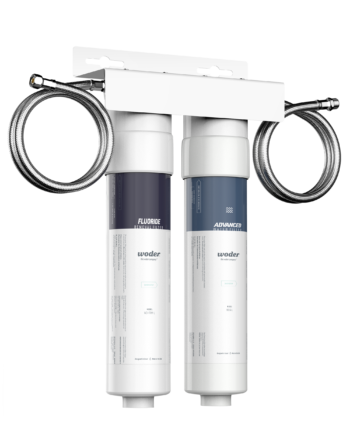
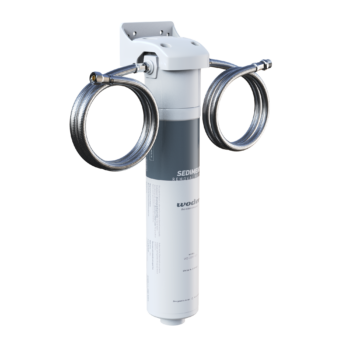
With a Woder inline setup, the filter sits inside the cold water supply line itself. Water passes through it on the way to your existing faucet—nothing added to the sink surface, no bulky storage tank eating up cabinet space.
That makes this setup especially useful for renters and apartment dwellers who can't make permanent plumbing modifications. It's also a good fit for homeowners who just want a clean, low-profile installation that doesn't change the look of their kitchen.
What You Need Before You Start
Get everything together before you go under the sink. Having the right materials within reach makes the job faster and less frustrating.
Tools and supplies:
- Adjustable wrench or channel-lock pliers
- Teflon tape (PTFE thread seal tape)
- A small bucket or towel to catch residual water
- The Woder filter unit with included fittings
- Push-to-connect or compression fittings if your supply line requires them (check your model's included hardware)
Before you buy: If you haven't chosen a model yet, the Wizard tool at woder.com walks you through your household flow rate and installation type to match you with the right unit. The WD-G4-210-JG is a compact residential option well suited to inline setups with standard flow requirements; the WD-10K-ADV-PORT is built for higher-flow households.
Also check the diameter of your cold water supply line before ordering. Most residential lines are 3/8-inch or 1/2-inch OD. Woder filters use push-to-connect fittings that accommodate standard tubing sizes, but confirming your line size ahead of time saves a second trip to the hardware store.
Step-by-Step: Installing Your Woder Inline Filter
Step 1: Shut Off the Cold Water Supply
Find the shut-off valve under the sink—typically a small oval or lever handle on the cold water line (the right-hand line when you're facing the cabinet). Turn it clockwise until it stops.
Open the cold tap above to release pressure and drain the line. Let it run until the water stops, then place your bucket or towel under the supply line connection point to catch any remaining water.
Step 2: Identify Your Cut Point
You're going to cut the cold water supply line at a spot where the filter body fits comfortably inside the cabinet. Look for a straight section of tubing with enough clearance on both sides for the filter housing plus a few inches of slack.
Avoid cutting near existing connections, sharp bends, or anywhere the tubing looks kinked or discolored. A straight, clean section gives you the best seal.
Mark the cut point. You'll be removing a short section of tubing equal to the length of the filter body plus the fitting depth on each side—typically 1/4 to 3/8 inch per side, but verify with your model's documentation.
Step 3: Cut the Supply Line
Use a tubing cutter for the cleanest result. A straight, square cut matters because push-to-connect fittings rely on even contact around the full circumference of the tube end to form a watertight seal.
If you're working with braided stainless supply hoses rather than plastic or copper tubing, the process is a bit different. Braided hoses use threaded fittings at each end rather than inline cuts, so you'll disconnect the hose at one end, insert a tee fitting or inline adapter, and reconnect. Your Woder model's included instructions will specify the fitting type for your configuration.
Remove the cut section of tubing and set it aside.
Step 4: Deburr and Prepare the Tube Ends
Run your finger around the cut edge of each tube end. Any burr or rough edge can prevent a push-to-connect fitting from seating fully and cause a slow drip over time. Use a deburring tool or the back edge of a utility knife blade to smooth the ends.
Wipe the outside of the tubing clean with a dry cloth for about two inches back from each cut. Dirt or moisture on the tubing surface can interfere with the fitting's O-ring seal.
Step 5: Connect the Inlet Side
Woder filters are directional. The inlet port is marked on the housing and must connect to the side of the supply line coming from the wall or shut-off valve. Installing it backward won't immediately damage the filter, but it will reduce filtration performance and may void the warranty.
Push the inlet tube end firmly into the inlet fitting until you feel it seat. With push-to-connect fittings, you'll notice a slight click or increase in resistance as the collet grips the tubing. Give the tube a gentle tug to confirm it's locked in—it shouldn't pull out under moderate tension.
Step 6: Connect the Outlet Side
Repeat the same process for the outlet fitting, connecting the tube end that runs toward your faucet. Push firmly until the tubing seats fully, then do the same tug test.
If your installation uses threaded connections with Teflon tape rather than push-to-connect fittings, wrap the male threads clockwise with two to three layers of tape before threading on the fitting. Hand-tighten first, then snug with a wrench. Don't overtighten threaded plastic fittings—snug plus a quarter turn is enough.
Step 7: Mount the Filter Body
Most Woder inline models include a mounting bracket, or can be secured with a zip tie or adhesive mount to the interior cabinet wall. Mounting the filter keeps it from shifting when water pressure cycles on and off, which protects the fittings over time.
Position the filter so the tubing runs without sharp bends on either side. A gentle curve is fine; a kink is not. Kinks restrict flow and put stress on the fitting connections.
Secure the bracket with the included hardware or with self-tapping screws appropriate for your cabinet material.
Step 8: Turn the Water Back On Slowly
Before restoring full pressure, visually check both fitting connections. Confirm the tubing is fully seated and the filter body is secure.
Turn the shut-off valve counterclockwise slowly—about a quarter turn at a time—and watch both connections as pressure builds. A small bead of water at a fitting means the tubing isn't fully seated. If you see a drip, shut the valve off immediately, release pressure at the faucet above, and reseat the tubing.
Once you've confirmed no leaks at low pressure, open the valve fully.
Step 9: Flush the Filter
Don't skip this step. New filter media contains fine particles from the manufacturing process, and flushing clears them before you drink the water.
Run the cold tap for at least five minutes continuously. The water may look slightly cloudy or discolored at first—that's normal and harmless. Keep flushing until it runs clear and any initial odor is gone.
Some Woder models specify a longer initial flush in their documentation. Follow the model-specific guidance if it differs from the five-minute baseline.
Common Installation Questions
What if my supply line is braided stainless, not plastic tubing?
Braided stainless hoses are common in newer construction and retrofits, and they don't cut cleanly for inline insertion. The better approach is to disconnect the hose at the faucet end, connect an inline adapter fitting to the hose's threaded end, run a short section of compatible tubing to the filter inlet, and then run tubing from the filter outlet back to the faucet connection. Your Woder model's documentation will specify the adapter type needed.
Can I install this on the hot water line instead?
No. Woder inline filters are designed for cold water lines only. Hot water can damage the filter media and reduce contaminant removal performance.
Does the filter noticeably reduce water pressure?
A properly installed Woder filter produces minimal pressure drop under normal residential flow rates. If you notice a significant reduction after installation, check for kinked tubing, a partially closed shut-off valve, or a fitting that isn't fully seated. A filter past its service life can also restrict flow—which is one signal that it's time for a replacement cartridge.
How do I know when to replace the cartridge?
Woder replacement cartridges are rated by gallons filtered, not by time. Track your household's typical daily water usage to estimate when you're approaching the rated capacity. Reduced flow rate and returning taste or odor issues are practical signs that the media is exhausted. Replacement cartridges are available directly through woder.com.
What the Filter Is Actually Doing
Once installed, Woder's Advanced Selective Filtration uses nanoparticles to attract and capture specific contaminants as water passes through the media. It removes lead, chlorine, chromium 6, mercury, PFAS, carcinogens, and volatile organic compounds at a 99.9% removal rate—while leaving calcium, magnesium, and other beneficial minerals in the water.
That's the core difference from a reverse osmosis system. RO forces water through a membrane that strips out virtually everything, including the minerals that contribute to water's natural taste and your daily mineral intake. You then need a remineralization cartridge to add some of those minerals back. Woder's approach skips that cycle entirely by targeting only the contaminants you want removed.
The filter also carries WQA Gold Seal certification—a third-party verified performance standard. In a market where broad removal claims are common and testing data is often hard to find, that certification is a meaningful distinction.
Maintenance After Installation
Inline filter maintenance is minimal. The main task is tracking filter life and replacing the cartridge before the media is exhausted.
Keep the area under the sink dry and check the fitting connections visually every few months, especially in the first year. Push-to-connect fittings are reliable but can loosen if tubing shifts due to pressure cycling or cabinet vibration.
When it's time to replace the cartridge, shut off the cold water supply first, release pressure at the faucet, and swap the cartridge according to the model-specific instructions. Flush the new cartridge for five minutes before resuming normal use—same as the initial installation.
FAQs
Q: Do I need any special plumbing skills to install a Woder inline filter?
A: No. The installation uses push-to-connect or threaded fittings that don't require soldering, crimping, or specialized tools. If you can use an adjustable wrench and cut tubing cleanly, you can do this. Most people finish in under an hour.
Q: Will a Woder inline filter work with a refrigerator's ice maker or water dispenser line?
A: Yes. Inline filters are well suited to refrigerator water lines because they insert directly into the supply tubing without requiring a dedicated faucet or any modification to the refrigerator itself. Just confirm the tubing diameter matches your model's fitting size before purchasing.
Q: Does the inline installation void any warranty on my faucet or plumbing fixtures?
A: No. The filter connects to the supply line, not to the faucet or fixture itself, so it doesn't modify or interact with the faucet's internal components.
Q: Can I install a Woder inline filter in an apartment without landlord permission?
A: The inline setup is less invasive than a dedicated-faucet installation since there's no drilling into the countertop or sink. That said, any modification to plumbing lines in a rental may require landlord approval depending on your lease. The installation is fully reversible—removing the filter and restoring the original supply line leaves no permanent trace.
Q: What contaminants does a Woder inline filter remove?
A: Woder's Advanced Selective Filtration removes lead, chlorine, chromium 6, mercury, PFAS, carcinogens, and volatile organic compounds at a 99.9% removal rate. It also reduces turbidity, odors, and off tastes, while retaining beneficial minerals including calcium and magnesium. Woder does not claim removal of bacteria or fluoride.
Q: How long does the installation take?
A: For a straightforward plastic tubing supply line, most installations take 30 to 60 minutes including the initial flush. Braided stainless hose setups may take a bit longer because of the additional adapter fittings involved.
Q: Which Woder model is best for an inline installation?
A: It depends on your household's flow rate and the tubing configuration under your sink. The Wizard tool at woder.com asks a few questions about your setup and points you to the right model—faster and more reliable than guessing from model numbers alone.
Installing a Woder filter inline is a practical, reversible way to get 99.9% contaminant removal from your tap water—no dedicated faucet, no storage tank, no plumber. Take your time on the fitting connections, flush the media thoroughly before your first glass, and the filter handles the rest.