You're standing under the sink with a replacement cartridge in one hand and a flashlight in the other, and the problem isn't the filter media at all. It's the housing. The label says 10-inch, but the threads don't match, the canister feels too tight in the cabinet, or the O-ring starts weeping after you put everything back together.
That's the part most product pages skip. A water filter housing 10 is defined by more than one measurement, and if you get the wrong one, the whole installation turns into a leak hunt. Fit, connection size, pressure limits, cartridge dimensions, and service habits all matter more than the word “10” suggests.
Table of Contents
- Why 10-Inch Filter Housings Cause More Confusion Than They Should
- Understanding the 10-Inch Housing Form Factor
- Connection Sizes and Plumbing Compatibility
- Pressure Ratings and Temperature Limits
- Standard vs Jumbo Cartridge Compatibility
- O-Ring Maintenance and Housing Service Life
- Installing a 10-Inch Housing Under Your Sink
- What a 10-Inch Housing Does Not Solve
- Troubleshooting Common Housing Problems
- Quick Reference Checklist for Housing Selection and Maintenance
Why 10-Inch Filter Housings Cause More Confusion Than They Should
The first mistake is assuming 10-inch means one universal part. In practice, it usually tells you only one piece of the puzzle, the cartridge length the housing is built around, not whether the unit will fit your cabinet, match your plumbing, or seal correctly after service. That gap is why homeowners end up with a housing that looks right online but behaves wrong in the world.
The problem is fit, not just filtration
When people talk about a replacement housing, they often jump straight to contaminant claims. That misses the day-to-day reality of the product. The main questions are usually simpler, and more practical, like whether the housing has brass or metal parts, how to open a stuck canister, whether the cartridge change will spray water, and how to avoid damaging the seal during reassembly.
Practical rule: if the listing doesn't show the port size, the cartridge diameter, and the pressure rating, keep looking.
That's also why clear education matters. A homeowner shopping for a water filter housing 10 needs published specs, replacement-filter pricing, and maintenance instructions before buying, not after the leak shows up. The category is full of standardized language, but the service questions are still buried in forum threads and product comments.
The useful mindset is to treat the housing as a plumbing component first and a filter holder second. If you know what your sink cabinet can physically accept, what your plumbing connection uses, and what your water pressure does under load, you're already ahead of most bad installs.
Understanding the 10-Inch Housing Form Factor
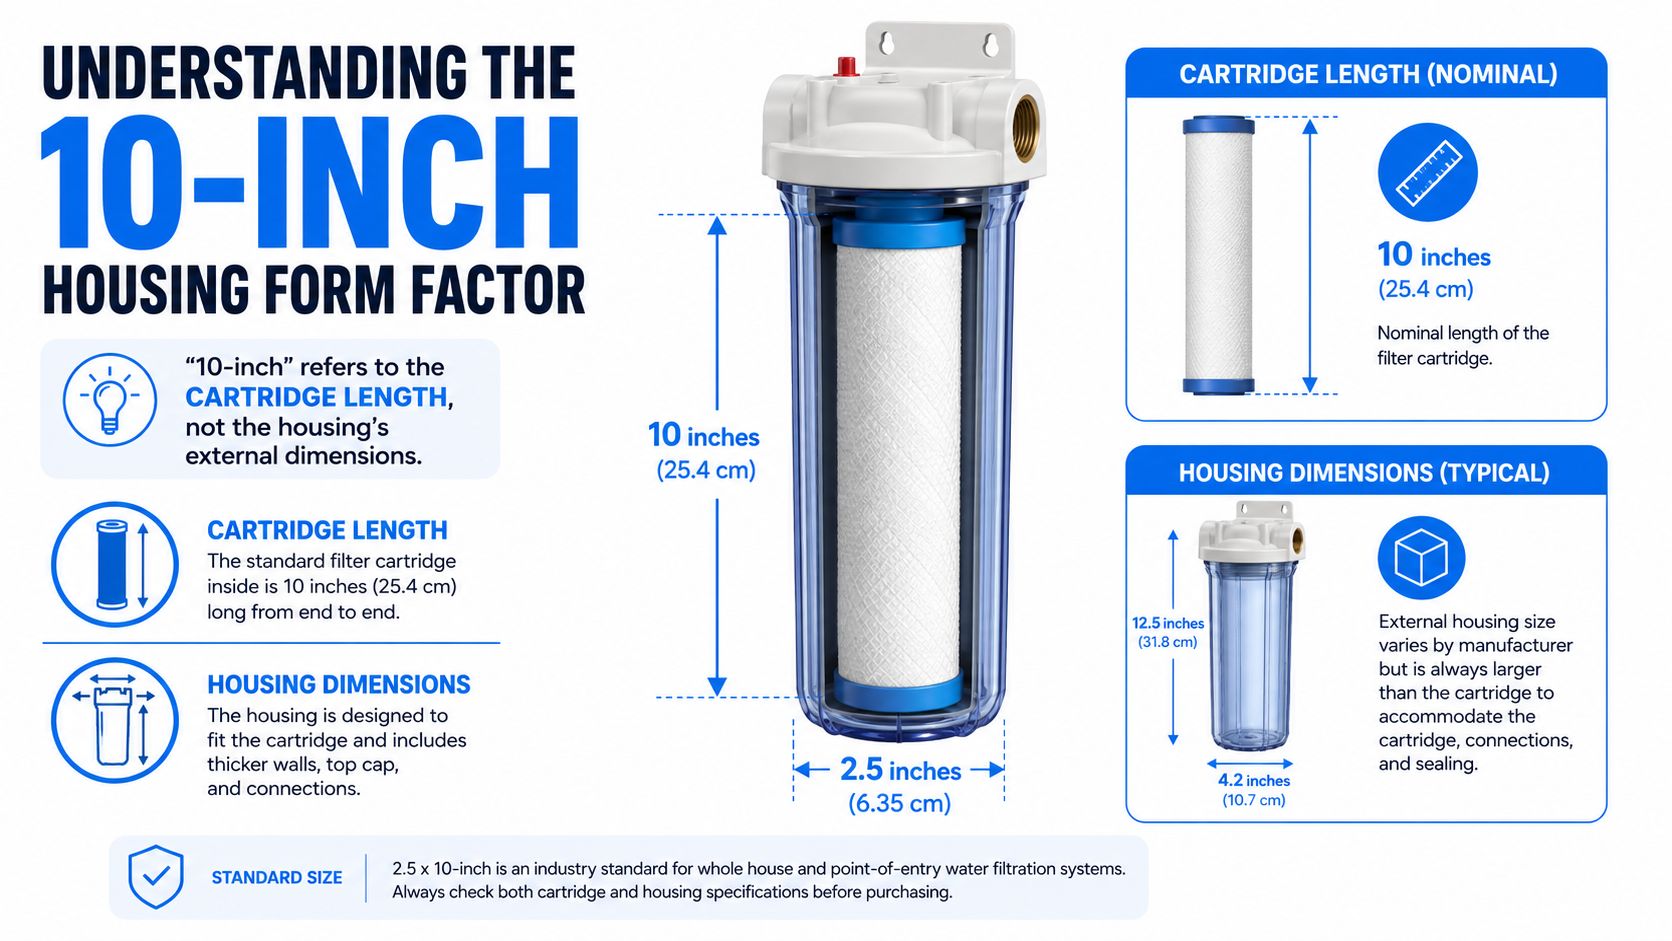
The phrase 10-inch refers to the cartridge length, not the outside of the housing. Most residential point-of-use housings are built around the 2.5 x 10-inch cartridge standard, so the internal chamber is designed to accept a filter element that is about 10 inches long and 2.5 inches in diameter. That naming convention is simple, but it is also where a lot of buying mistakes begin.
Sump, Head, and the Seal That Matters
A housing has two main parts. The head is the upper section with the inlet and outlet ports. The sump is the lower bowl that holds the cartridge. Between them sits the O-ring in a groove, and that seal is what keeps water in the housing when the system is pressurized.
If the O-ring is dirty, dry, twisted, or pinched, the housing can leak even when the cartridge is correct. That is why the seal gets more attention in service work than it usually gets in product listings. The housing does not hold because the sump is cranked down hard. It holds because the O-ring compresses evenly between the sump and the head.
On a real install, that seal can be the difference between a clean service and a soaked cabinet. If the groove is not clean, if the O-ring is rolled out of place, or if the sump is cross-threaded on the way back up, water finds the weak point fast. I have seen homeowners blame the cartridge when the problem was a dry seal or a gasket that should have been replaced during service.
The same practical check applies to cartridge choice. A sediment stage may be a simple part on paper, but the housing still has to match the cartridge format, leave enough room for service, and allow the sump to drop without fighting the cabinet floor or nearby plumbing. If access is tight, maintenance gets harder every time you open it.
The primary job is fit, clearance, and serviceability. If the housing format is right but the cabinet is too cramped, or the seal cannot be inspected and lubricated properly, the system may still be a bad match for the space under the sink.
Connection Sizes and Plumbing Compatibility
Most purchasing mistakes happen in this area. A 10-inch housing is not one universal plumbing size, even if the cartridge form factor looks familiar. Published product specs show common inlet and outlet options in 3/4-inch, 1-inch, and 1/4-inch connections, and those are not interchangeable without planning.
Match the port size to the job
A 1/4-inch connection usually feeds a dedicated drinking faucet or refrigerator line. That's a small line, and it's meant for a point-of-use branch, not a high-flow main. 3/4-inch and 1-inch ports are more appropriate when the housing is part of a line that needs more throughput and less restriction.
If you're unsure what you have, measure the existing threaded connection rather than guessing from the outside diameter of the fitting. A pipe thread that “almost” fits is not a fit. Forcing it with an adapter can create a stress point, and stress points are where leaks start.
| Common 10-Inch Housing Connection Sizes | Typical Application | Flow Rate Suitability | Common Use Case |
|---|---|---|---|
| 1/4-inch | Dedicated drinking faucet or refrigerator line | Low flow, point-of-use | Under-sink drinking water branch |
| 3/4-inch | Residential filtration line | Moderate to higher flow | Sink or small branch line |
| 1-inch | Larger residential line | Higher flow suitability | Main branch or higher-demand setup |
Measure first, adapt second. If the thread size is wrong, the right housing is the one that matches your plumbing, not the one that needs the most adapters.
This is also where a lot of homeowners overcomplicate the fix. If your cabinet plumbing is already set for a smaller branch, don't buy a larger-port housing and assume adapters will make it easier. Extra fittings mean extra leak points, and every added junction needs to be supported properly.
Pressure Ratings and Temperature Limits
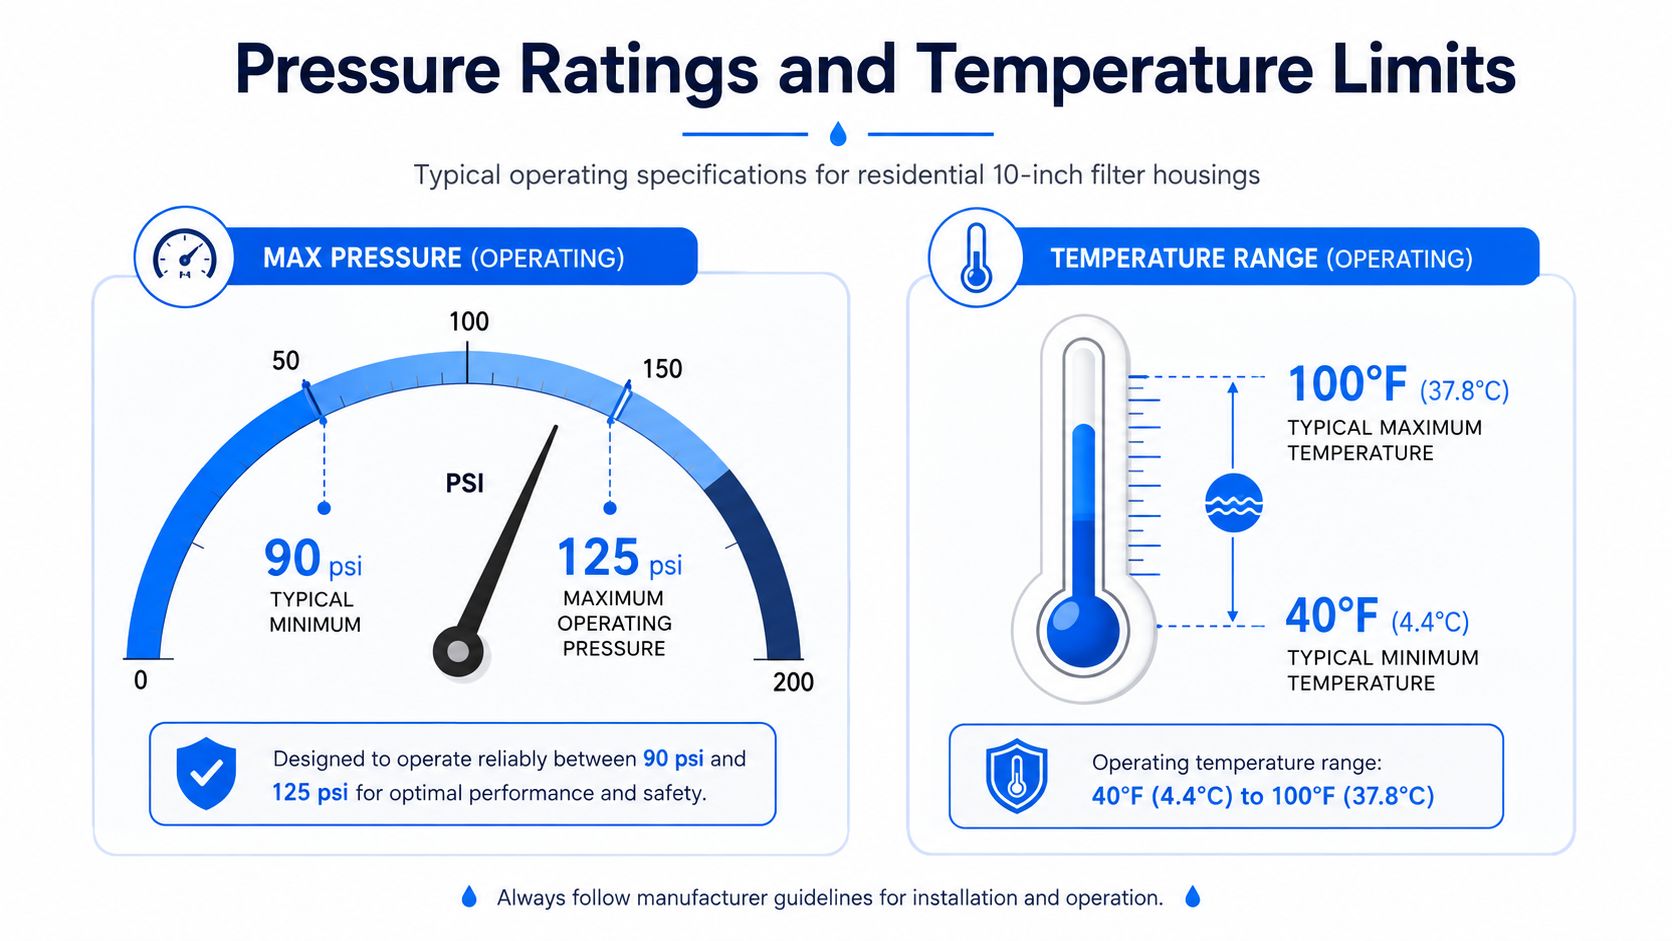
Every housing has an operating envelope, and the envelope is tighter than many buyers expect. Published examples for residential 10-inch housings show ratings from 90 psi up to 125 psi maximum pressure, with temperature limits from 40°F to 125°F. If the housing is pushed beyond that range, the failure is usually mechanical, not subtle.
Why pressure matters before you mount anything
Pressure spikes are hard on plastic housings. They can crack a canister, distort the seal, or blow water past the O-ring when the system sees a sudden surge. That's why checking home pressure before installation isn't optional. A simple gauge on an indoor hose bib or laundry outlet tells you more than guessing ever will.
If the pressure is too high, a pressure-reducing valve upstream can protect the housing and everything downstream. That's especially important if the water supply surges at different times of day or if the house already has older plumbing that amplifies shock.
Temperature is just as important
The other limit homeowners overlook is heat. A housing rated for residential cold-water use is not meant for a hot water line, and an under-sink location in freezing conditions is a separate risk. Plastic gets brittle when conditions move outside the design range, and that's when you see split bodies, deformed threads, or sudden leaks.
The rule is simple. Match the housing to the water it will see, not the water you hope it sees. If the pressure or temperature is outside the spec sheet, the housing isn't the problem. The install is.
Standard vs Jumbo Cartridge Compatibility
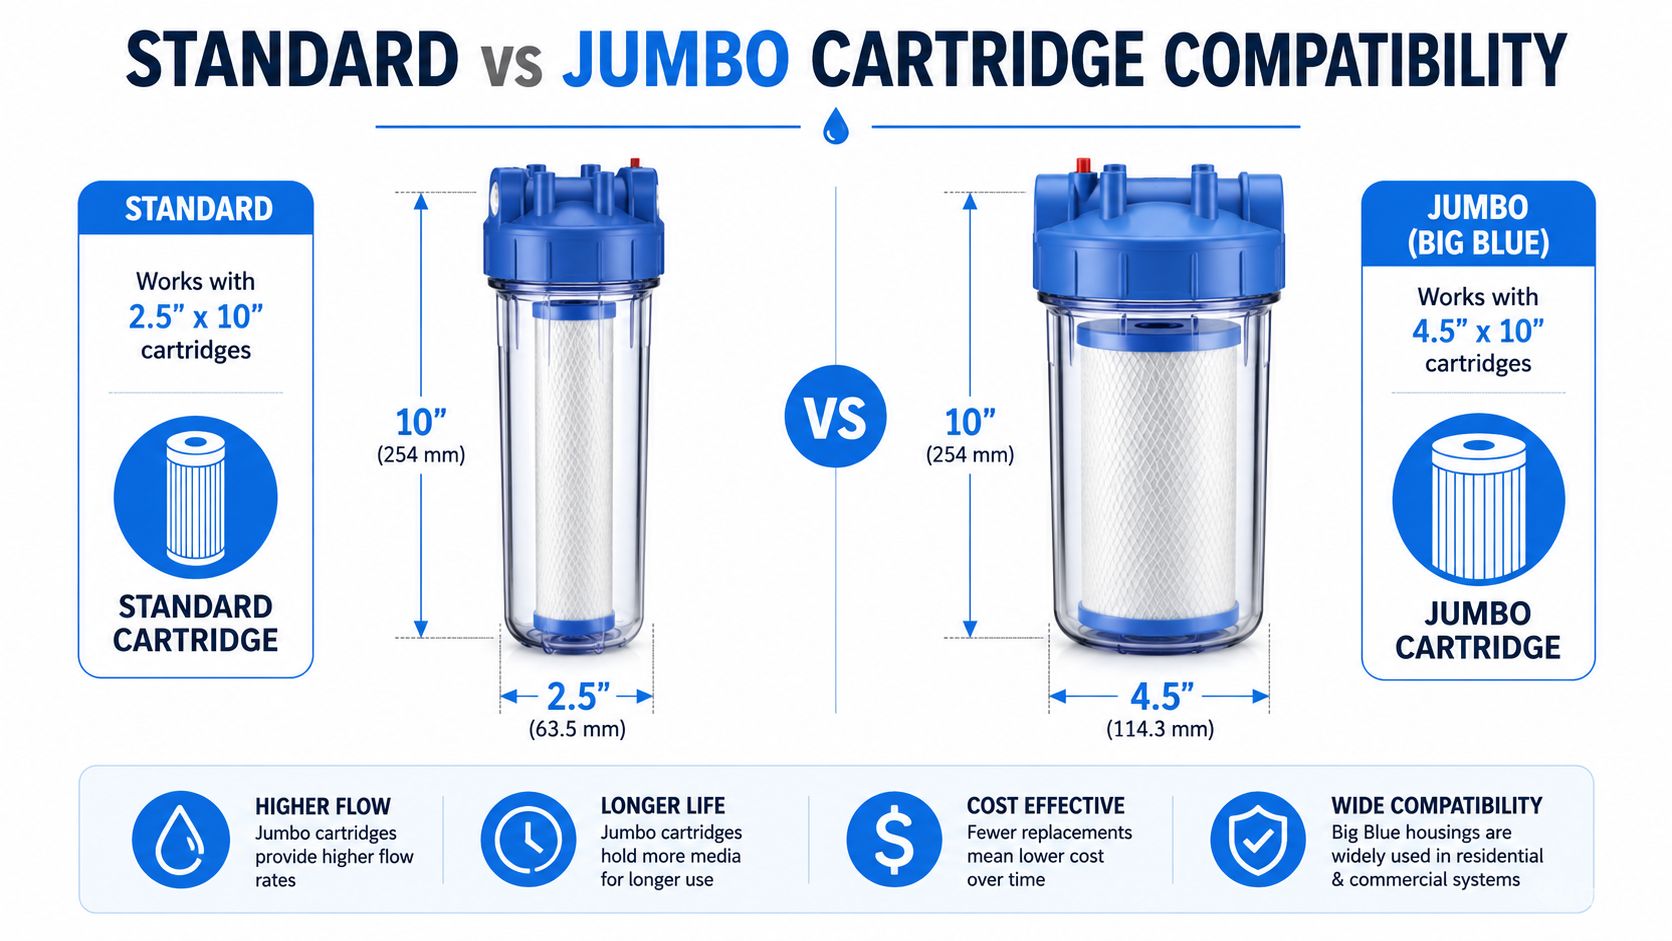
The common residential format is 2.5 x 10 inches, but not every housing accepts that same cartridge diameter. Some housings are built for larger 4.5 x 10-inch jumbo cartridges, often called big blue style cartridges, and those are physically different enough that you can't treat them as drop-in swaps.
Diameter changes the whole installation
A standard 2.5-inch cartridge is compact and fits tight under-sink spaces more easily. A 4.5-inch jumbo cartridge gives you a larger body and more room for media, but the housing gets bigger too. That makes it more forgiving in some high-sediment applications, yet harder to place where cabinet space is limited.
The other detail that trips people up is length tolerance. Some housings accept elements ranging from 9.75 to 10 inches in length, while others want an exact 10-inch cartridge. Verify both the diameter and the length before ordering, because a close match on paper can still be wrong in the sump.
The safest order process is boring, but it works. Check the housing label, confirm the cartridge diameter, confirm the cartridge length, and compare the new cartridge to the one you're replacing before opening the package. If you're replacing a standard cartridge, the matching replacement guide at Woder's cartridge replacement article is a useful reference point for the kind of information homeowners should expect to see before they buy.
O-Ring Maintenance and Housing Service Life
The O-ring is the smallest part that causes the biggest headaches. It is the seal that keeps the sump and head watertight, and it usually fails because it gets ignored until the first drip shows up. A flattened, cracked, sticky, or nicked O-ring is already telling you it is near the end of its useful life.
What to do at each service interval
At every cartridge change, clean the O-ring groove and inspect the ring closely. Wipe out grit, scale, and old grease, because even a small particle can keep the seal from seating evenly. A light coat of food-grade silicone grease helps the ring seat properly and reduces friction when the housing is tightened.
If the ring looks flattened or damaged, replace it instead of trying to get one more cycle out of it. If you want a standard replacement process to compare against your own housing, the water filter replacement guide is a useful reference.
Practical rule: if the O-ring no longer looks round and supple, do not trust it under pressure.
Housing service life matters too. Many manufacturers recommend replacing the entire housing after about six years of normal use because plastic fatigue and micro-cracking can build up where you will not see them. That is a harder call to make than replacing a cartridge, but it is the right one when the body has been under pressure for years and the threads start to lose their clean feel.
Why reuse can be false economy
A new cartridge in an old housing only works if the housing still holds its shape and the threads are sound. Once the body has started to age, you can spend more time chasing leaks than you would spend replacing the unit. An old housing can also make future maintenance harder because the threads bind, the cap sticks, and the O-ring groove gets less forgiving over time.
That is why service parts matter as much as the cartridge itself. If you are checking the housing during routine maintenance, the replacement is an investment in keeping the whole assembly predictable, not just keeping water moving. A housing that seals cleanly, opens without a fight, and accepts a fresh ring without distortion is the one that will give you fewer surprises at the next changeout.
Installing a 10-Inch Housing Under Your Sink
Under-sink installs fail most often because the housing was mounted where nobody could service it. Leave enough clearance below the sump for cartridge removal, because a filter change with no room to drop the bowl turns into a mess fast. In practical terms, you want several inches of open space under the housing so the sump can come down cleanly.
Mounting, sealing, and opening the supply
Fasten the bracket to solid cabinet material, not thin paneling that flexes. Use thread sealant or Teflon tape on threaded connections where the fitting calls for it, then tighten the joints in sequence without over-torquing. Cross-threading or muscling the cap down is a quick way to damage the housing before it ever sees service.
When the system is assembled, open the water supply slowly and watch the connections for several minutes. A dry joint for the first ten seconds isn't proof of anything. Tiny leaks often show up only after the housing pressurizes fully.
Some housing heads include a pressure relief button. Use it during cartridge changes to release trapped pressure before you unscrew the sump. That makes the housing easier to open and helps reduce the chance of a sudden spray.
If you want a visual walkthrough for the physical install, the Woder under-sink installation guide is the kind of reference homeowners should compare against any housing they buy, even if the exact unit differs.
What a 10-Inch Housing Does Not Solve
A standard housing does not fix every water problem by itself. If the incoming water carries a heavy sediment load, the cartridge clogs early, flow drops, and the housing ends up doing more work than it should. Sand, grit, and rust are hard on the cartridge first, then they start showing up as service headaches for the housing body and the seal.
Upstream sediment management matters
A sediment stage or pre-filter ahead of the finer cartridge often makes the whole system behave better. Well water and older municipal lines can send enough particulate into the line to shorten cartridge life and make repeated service cycles harder on the O-ring and sump threads. The housing can still be in good condition and still be a poor match if the water is too dirty for that stage to handle alone.
The CDC recommends testing water and choosing filters for the contaminants present, and the EWG stresses matching the filter to the local water problem instead of assuming one product covers everything. That same logic applies to housing selection. The shell is part of a system, and the cartridge choice, sediment load, and service interval all have to fit together.
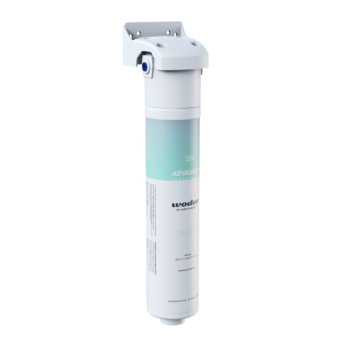
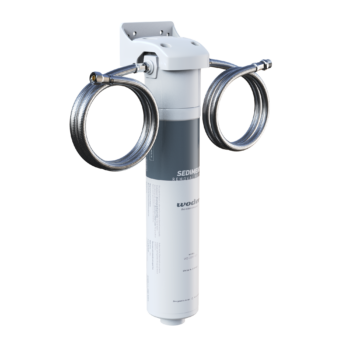
If you are comparing sediment-first options, Woder's sediment filter product is an example of a 20µ pre-sedimentation approach aimed at dust, dirt, and contaminants before the finer stage does its work. The label matters less than the setup. The key question is whether the system matches the water coming into the house and gives the cartridge a fair service life.
Troubleshooting Common Housing Problems
A housing that won't open usually needs the correct wrench, not more force. Grip the canister with the right housing wrench, apply steady pressure, and don't jerk it. If the O-ring has stuck, a little warm water around the joint can help loosen it before you try again.
Symptom, likely cause, and fix
- Leak at the sump seam: The O-ring is often pinched, dry, dirty, or seated out of its groove. Remove the sump, clean the groove, lubricate the ring lightly, and reseat it squarely.
- Leak at the inlet or outlet: The thread sealant may be insufficient, or the fitting may have been cross-threaded. Back it off, inspect the threads, and reassemble without forcing the angle.
- Pressure drop after installation: The cartridge is likely loading up with sediment, which means the cartridge needs attention, not the housing body.
- Housing feels stuck during service: Use the wrench, steady pressure, and patience. Over-force is how plastic threads crack.
The symptom usually tells you whether the problem is sealing, threading, or cartridge loading. Read the leak before you reach for another tool.
If the housing is old and the threads no longer feel crisp, stop trying to save it with extra torque. That's usually the point where replacement becomes cheaper than another failed service call.
Quick Reference Checklist for Housing Selection and Maintenance
A 10-inch housing causes problems fastest when the fit is off. Before you buy, confirm the connection size matches your plumbing, verify the cartridge diameter and length, and check the pressure and temperature ratings against the water conditions in your home. Make sure the cabinet leaves enough room to drop the sump for service, because a housing that cannot be opened comfortably turns into a maintenance problem on day one.
Keep the maintenance simple
- Confirm connection size matches plumbing. Match 1/4-inch, 3/4-inch, or 1-inch ports to the actual line.
- Check pressure rating compatibility. Stay within the housing's rated envelope.
- Verify temperature limits. Keep the housing in a cold-water application within its published range.
- Ensure cartridge size fits. Confirm 2.5 x 10 or 4.5 x 10 before buying.
- Inspect O-rings regularly. Look for flattening, cracks, or nicks at every service.
- Note installation date. Housing age matters as much as cartridge age.
- Schedule cartridge replacement. Do not let sediment loading decide for you.
For homeowners who want a broader home-maintenance reference, Restore Heroes keeps a practical plumbing inspection checklist 2026 that pairs well with filter-housing planning.
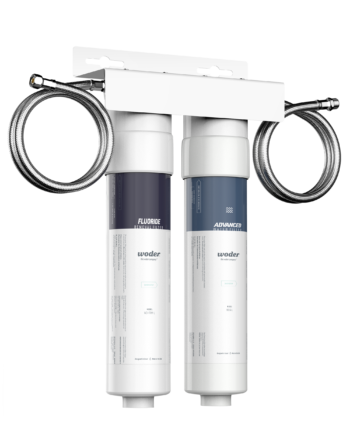
If you are matching a sediment stage to a point-of-use setup, an example of an under-sink pre-sedimentation unit is a useful reference point for how cartridge choice and service timing need to line up with the housing itself. A key takeaway is simple: the housing, the cartridge, and the maintenance schedule all have to fit the same system, or the setup becomes harder to live with than it should be.
Woder Filters helps homeowners compare point-of-use options with clearer specs, replacement cartridges, and installation resources that make housing and cartridge selection easier to get right the first time. If you want a U.S.-made filtration approach that keeps fit, maintenance, and contaminant reduction in the same conversation, visit Woder Filters and start with the system that matches your water, your cabinet space, and your plumbing.