- Step 1: Pull Your Local Water Quality Report
- Step 2: Test Your Tap Water Directly
- Step 3: Understand What Your Filter Actually Needs to Do
- Step 4: Choose the Right Under-Sink Filter for Your Home
- Step 5: Plan for Ongoing Maintenance
- Step 6: Think About Whole-Home vs. Point-of-Use
- The Short Version: Your New Home Water Checklist
- Frequently Asked Questions
Moving into a new home means a hundred things on your list — paint colors, appliance warranties, figuring out the neighborhood. But one thing most people skip entirely is the water coming out of their taps. That's worth fixing before you ever fill a glass.
You don't know the history of the pipes in your new home. You don't know what the previous owners did or didn't filter. And depending on where you live, your municipal supply may carry contaminants your utility is legally permitted to deliver at low levels. That doesn't mean the water is safe for long-term drinking. It means it passed a threshold.
Here's exactly what to test, what to look for, and how to filter your water before you start drinking it in 2026.
Step 1: Pull Your Local Water Quality Report
Your water utility publishes an annual Consumer Confidence Report (CCR). It lists detected contaminants, the levels found, and the legal limits. You can usually find it on your utility's website or request it directly.
Read it with one question in mind: what's present, even at "acceptable" levels?
Pay particular attention to:
- Lead — especially in homes built before 1986, where lead solder or pipes may still be in place
- PFAS (per- and polyfluoroalkyl substances) — increasingly detected in municipal supplies across the US
- Chlorine and chloramines — added for disinfection, but linked to taste, odor, and long-term health concerns
- Chromium 6 — a known carcinogen found in water supplies across many states
- Volatile organic compounds (VOCs) — can enter groundwater from industrial or agricultural sources nearby
One important caveat: the CCR reflects what's in the supply at the treatment plant. It doesn't account for what happens in the pipes between there and your kitchen faucet.
Step 2: Test Your Tap Water Directly
A utility report is a starting point, not a complete picture. Old pipes, a corroded service line, or your home's own internal plumbing can introduce contaminants after the water leaves the treatment facility.
Testing your tap water gives you a specific, accurate baseline for your home — not your neighborhood, not your city. Your home.
What to test for
At minimum, test for:
- Lead
- PFAS (look for a panel that covers PFOA and PFOS at minimum)
- Chlorine
- Nitrates (especially relevant in agricultural areas or homes with a private well)
- pH and hardness
Woder offers water testing kits you can use at home — a practical first step before you decide which filter fits your situation.
Well water vs. municipal water
If your new home uses a private well, testing matters even more. Wells aren't regulated the way municipal supplies are, and contamination from agricultural runoff, septic systems, or naturally occurring minerals can vary significantly by region. Test when you first move in, and at least once a year after that.
Step 3: Understand What Your Filter Actually Needs to Do
Once you have your test results, you can match your filter to your actual water profile rather than guessing.
Here's how the main filter types stack up:
| Contaminant | Pitcher Filter | Under-Sink Filter | Reverse Osmosis |
|---|---|---|---|
| Lead | Partial | Yes (99.9%) | Yes |
| PFAS | No | Yes (99.9%) | Yes |
| Chlorine | Yes | Yes (99.9%) | Yes |
| Chromium 6 | No | Yes (99.9%) | Yes |
| Calcium/Magnesium (minerals) | Removed | Preserved | Removed |
| Wastewater produced | No | No | Yes |
| DIY installation | N/A | Yes | Complex |
Pitcher filters are convenient, but they're not built for serious contaminants like PFAS or lead. Reverse osmosis systems go the other direction — they remove nearly everything, including the calcium and magnesium your body actually benefits from, and they produce wastewater in the process. Installation usually means calling a plumber.
An under-sink filter sits in the middle: serious filtration performance, no wastewater, no plumber, and no stripping of the minerals worth keeping.
Step 4: Choose the Right Under-Sink Filter for Your Home
Not all under-sink filters work the same way. The key questions are: what does it remove, what does it keep, and how does it install?
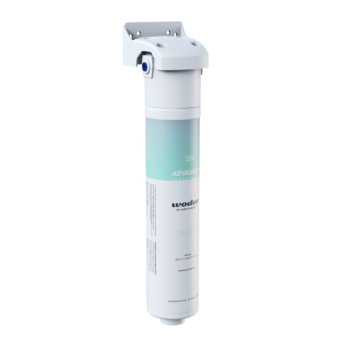
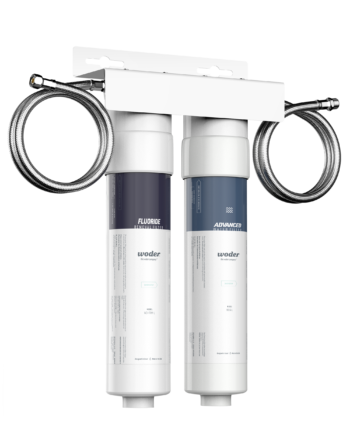
Woder builds its filters around Advanced Selective Filtration technology, which uses nanoparticles to attract and remove contaminants while leaving naturally occurring minerals intact. Lead, PFAS, chlorine, chromium 6, mercury, and VOCs come out. Calcium and magnesium stay in.
Remove the bad. Keep the good. That's the Woder difference.
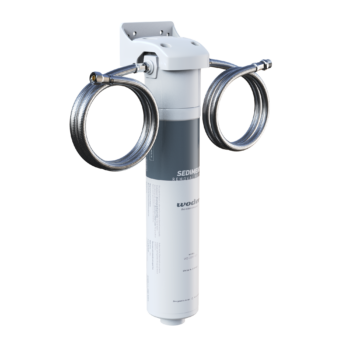
Woder filters install directly into your existing water line under the sink — no tank, no whole-home overhaul, no plumber. Most homeowners have it done in under an hour.
Matching the model to your household
Woder makes several models based on flow rate and household size:
- WD-G4-210-JG — compact residential unit, well-suited for smaller households
- WD-D-8K-FRM-ADV-DC — 8 kGPM under-sink model for standard family use
- WD-10K-ADV-PORT — 10 kGPM high-flow option for larger households or higher demand
- WD-S-5K-REP — replacement cartridge model for existing Woder owners
- Water-Filter Bottle — portable filtered water for when you're away from home
Not sure which one fits? The interactive Wizard at woder.com/wizard walks you through it based on your household size and water concerns.
Step 5: Plan for Ongoing Maintenance
Buying a filter is step one. Keeping it working is step two.
Replacement cartridges wear out over time as they accumulate contaminants. Most under-sink filters need a cartridge change every six to twelve months, depending on your water quality and how much your household uses. Woder sells replacement cartridges separately, so you swap the cartridge — not the whole unit.
Set a reminder now. A spent cartridge doesn't announce itself. The water won't taste different. The filter will just quietly stop performing at full capacity while looking exactly the same.
Step 6: Think About Whole-Home vs. Point-of-Use
An under-sink filter covers your drinking and cooking water — which is where most of your contaminant exposure actually happens. Ingestion is the primary concern.
Whole-home systems treat every tap in the house, including showers and laundry. They cost more, require professional installation, and aren't always necessary. For most new homeowners, a high-performance under-sink filter at the kitchen tap is the practical, cost-effective place to start.
If your test results show serious contamination across multiple sources, or you have young children with significant exposure through bathing, a whole-home system may be worth looking into. But for the majority of households, the kitchen tap is where to begin.
The Short Version: Your New Home Water Checklist
Before you drink from your new taps, work through this list:
- Pull your utility's Consumer Confidence Report
- Test your tap water directly, especially for lead and PFAS
- Check whether your home has pre-1986 plumbing or a private well
- Choose a filter matched to your actual contaminant profile
- Install an under-sink filter at your kitchen tap
- Set a recurring reminder for cartridge replacement
- Retest annually, especially if your local water quality changes
It's your water. You should know exactly what's in it — and what's been taken out.
Frequently Asked Questions
Do I need to test my water if I'm moving into a new construction home?
Yes. New construction can still have contaminants from municipal supply lines, and some building materials introduce their own concerns. Testing gives you a real baseline regardless of the home's age.
What's the difference between an under-sink filter and a reverse osmosis system?
An under-sink filter like Woder installs inline into your existing water line, removes 99.9% of contaminants, preserves beneficial minerals, and produces no wastewater. A reverse osmosis system removes nearly everything — including minerals — requires a storage tank, and typically needs professional installation. It also produces significant wastewater for every gallon filtered.
How do I know if my home has lead pipes?
Homes built before 1986 are most likely to have lead solder or lead service lines. Check with your water utility, inspect visible pipes under sinks (lead pipes are dull gray and soft enough to scratch with a key), or use a home water test kit. When in doubt, test.
How often do I need to replace my under-sink filter cartridge?
Most cartridges need replacing every six to twelve months, depending on household water usage and local water quality. Woder sells replacement cartridges separately, so you replace the cartridge rather than the full unit.
Can a pitcher filter handle PFAS and lead?
Most pitcher filters aren't designed to remove PFAS or lead at meaningful levels. They handle chlorine and some sediment reasonably well, but for serious contaminants, you need a filter specifically rated for those substances.
Is an under-sink filter hard to install?
Not with the right one. Woder filters connect directly into your existing water line — no plumber needed. Most homeowners finish the installation in under an hour with basic tools.
What if I rent and can't modify the plumbing?
Woder makes inline filters that connect without permanent plumbing changes, and the portable Water-Filter Bottle is a solid option for renters who want filtered water with zero installation. Many inline installs are fully reversible, but check with your landlord before making any under-sink connections.
Your new home is a fresh start. Make clean water part of it from day one. Find the right filter for your household at woder.com.